
Like Sisyphus with his boulder, you’ve wrestled your pack up that incline only to realize flat ground is a myth. Now you’re staring at a slope, and your tent’s about to become a slide.
Seven steps separate you from a stable night’s sleep, and the first one might surprise you: you’re not looking for level ground, you’re looking for the least worst option. I’ll show you how to turn that hillside into something resembling a bedroom, starting with a trick I learned the hard way on a 15-degree grade in the Tetons.
Find the Flattest Ground on a Slope (and Check Drainage)
Where exactly should you pitch when every direction feels like a hillside? You’ll find the flattest ground available, scanning for natural shelves or depressions that minimize how much your tent rocks during the night. Less slope means fewer leveling tools and better sleep.
Once you’ve spotted a candidate, you’ll clear it thoroughly. Kick away sticks, rocks, pinecones, and anything else that’ll poke through your floor. I’ve learned this the hard way: a walnut-sized stone feels like a boulder at 2 AM.
You’ll check overhead too. Scan for dead branches or “widow makers,” those loose limbs that drop without warning in wind or rain. Your tent can’t protect you from a falling trunk.
Before staking, you’ll align your footprint corners with your tent body. This ensures doors and vents work with, not against, the slope and breeze.
Recommended Products

A MUST FOR TENT: An extra tent tarp doesn't just give you extra waterproofing, it is used as ground cloths under tents to prevent wear and tear. There’s no question that an insulated tent footprint is a great idea to help protect your investment, definitely, the choice to extend your tent's life
A MUST FOR TENT: An extra tent tarp doesn't just give you extra waterproofing, it is used as ground cloths under tents to prevent wear and tear. There's no question that an insulated tent footprint is a great idea to help protect your investment, definitely, the choice to extend your tent’s life

Ultralight and Compact: Size 56'' x 80'', weighing a mere 0.52lbs, Made of high-density material, keeping your gear as light as possible.
Parallel vs Perpendicular: How to Choose Your Tent Orientation
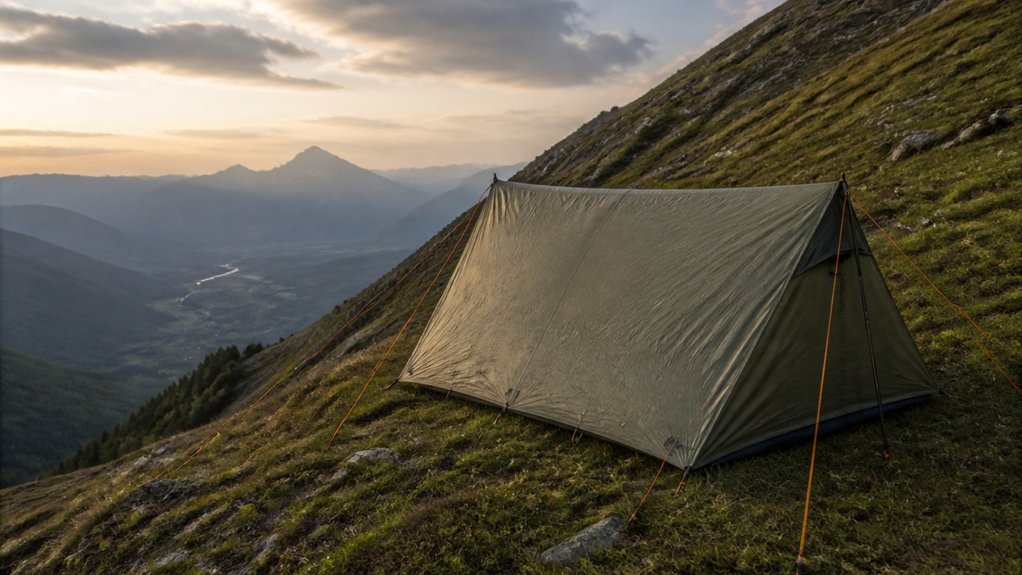
How you orient your tent on a slope determines whether you’ll sleep soundly or spend the night fighting gravity. You’ll weigh two slope orientation options, each with distinct trade-offs.
Pitch parallel with the slope and you’ll sleep head uphill, letting gravity work with you. For steeper angles, place backpacks at your feet or beneath them; you’ll create a hammock-like cradle that reduces sliding.
Sleep head uphill when pitching parallel—let gravity cradle you in place.
Or pitch perpendicular, keeping head and feet level while one side drops lower. You’ll pad the downhill side of your sleeping pad with clothing for support. Ensure your entrance faces uphill here, preventing gear from rolling away.
When deciding, assess slope direction, wind exposure, and water flow. You’ll determine which setup better stabilizes your sleeping area. Your choice depends entirely on terrain specifics.
Recommended Products

✔Compatibility : Tent peg stakes; Diameter 6mm/0.23in; Length 18cm/7in; 16g per unit;

Choose American. Choose Certainty. Eurmax Canopy is North America’s #1 factory store, stocking all canopies, accessories, and patio umbrellas right here in the U.S.

6-pack of lightweight, durable, and versatile camping and backpacking tent stakes that stay put
Pitch Parallel to Stop Yourself Rolling Downhill
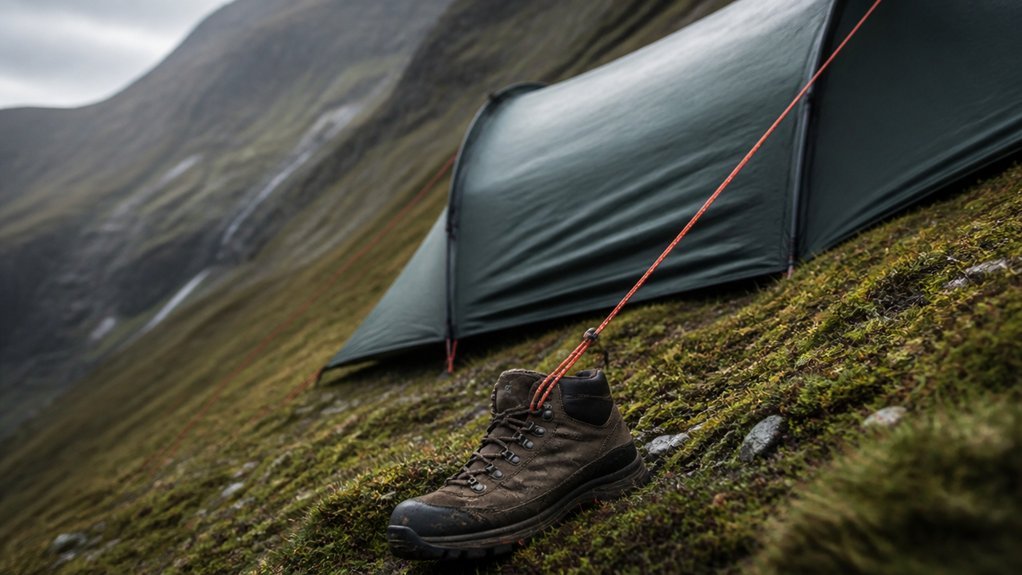
You’ll stop yourself from sliding downhill by pitching parallel to the slope and sleeping with your head elevated. Your gear placement matters too: position a backpack at your feet on steeper angles, and always face the entrance uphill so nothing escapes and water stays out. These body positioning strategies and gear placement tips (plus that essential entrance orientation) turn a miserable night into manageable rest.
Recommended Products

Lightweight and Durable: The OneTigris STELLA Camping Tent features a lightweight and durable 20D Nylon outer fabric with a single-layer silicone coating, making it both sturdy and easy to carry at only 4.4lb/2kg. Suitable for backpackers, bushcrafters, everyday campers, and families Waterproof: With a 3000mm waterproof rating, the STELLA camping tent is perfect for use in all weather conditions. The removable blackout outer tent allows for greater flexibility in use.

Guy Rope 4mm Reflective Cord Guy Line Tent Guide Rope with Aluminum Adjuster 13 Feet 8 Pack for Tent Tarp Outdoor Packaging

【Protect Your Hands】 Night Cat backpacking tent (ZP-10) uses the upgraded fiberglass pole that is fully covered with PROTECTION CASE. Comparing the traditional fiberglass pole under single layer only, the double layer design can protect your hands when assembling to avoid the tiny scrap inserting your hands
Body Positioning Strategy
Why fight gravity when you can work with it? Your slope alignment determines everything. Pitch your tent parallel with the incline and sleep with your head uphill. This simple adjustment prevents you from rolling onto the downhill side during the night.
Position the tent entrance uphill so your gear stays put. You won’t tumble out, and you’ll avoid that morning catapult effect from the downhill angle.
If the slope feels steep, brace yourself. Place your backpack at the foot end or wad clothing under your feet. This creates hammock-like padding that reduces sliding. Pad the downhill side of your sleeping pad too, evening out the surface when gravity pulls everything sideways.
I’ve learned these small adjustments make the difference between a restless night and actual sleep.
Gear Placement Tips
Where does everything go once you’ve got your tent pitched parallel to the slope? For slope management, you’re not just fighting gravity; you’re organizing against it.
First, shove your pad or spare clothing under the downhill side of your sleeping area. That evens the surface, so you won’t roll into your tent wall all night.
Next, keep your head uphill. It’ll prevent that throbbing morning headache. Your gear bags? Stash them downhill as a foot stop.
And don’t forget a cot with adjustable legs to level your sleep system; blocks work too if you’re roughing it. If the slope feels too steep for these tricks, just move camp. You don’t need that fight, especially on wet ground.
Quick, simple placement keeps you stable and comfortable without overthinking it.
Entrance Orientation Guide
How you point that door matters more than you’d think. You’ll pitch parallel to the slope in your slope-oriented setup, with your head uphill and the entrance facing that direction. This stops your gear and your body from tumbling downhill when you move.
I learned this the hard way after losing a boot in the dark. When your door faces uphill, items stay put. Rain runs away from your tent too.
For steeper angles, place your pack at your feet to create a barrier against sliding. You can pad the downhill side with clothing to level your sleeping surface. I’ve used this parallel pitch for ten years without rolling once. Perpendicular alignment works too, but keep most sleeping space uphill.
Pitch Perpendicular to Sleep Across the Slope
What happens when you can’t find flat ground? You pitch perpendicular to sleep across the slope. This slope alignment keeps your head and feet level while one side stays lower, cutting your slide risk significantly.
You’ll orient the tent opening perpendicular to the slope, then position your head uphill with feet toward the bottom. This prevents sliding and keeps gear from rolling away. Pad the downhill side of your sleeping area with clothing or soft items to even out the surface against the incline. Cushion your feet area with pillows to minimize slipping.
Equipment with adjustable legs helps here, letting you adapt to varying slope degrees while maintaining stable sleep orientation. I’ve used this on 15-degree grades where nothing else worked. The technique isn’t perfect, but it beats sliding downhill all night.
Recommended Products
![Pro Venture Waterproof Hammock Rain Fly [12ft x 9ft] - Portable Large Camping Tarp - Premium Lightweight Ripstop Nylon Cover - Fast Set Up + Accessories - A Camping Gear Essential! 12x9 ft HEX Shape](https://m.media-amazon.com/images/I/41XXZGTrJ9L._SL500_.jpg)
Outstanding Water Shedding for True All Weather Protection: Our Rain Flies are made from PU 3000 Diamond Ripstop Nylon making them extra durable, tear- and puncture-resistant, giving you long-lasting cover from anything Mother Nature throws at you, come rain or shine.

Waterproof Protection: Built from ripstop nylon with taped seams, our waterproof camping tarp blocks rain and shields your hammock from wet conditions. Use it confidently as a rain fly for hammock camping or a tent rain fly during backcountry trips.
Waterproof Protection: Built from ripstop nylon with taped seams, our waterproof camping tarp blocks rain and shields your hammock from wet conditions. Use it confidently as a rain fly for hammock camping or a tent rain fly during backcountry trips
Level Your Sleeping Surface With Branches and Logs
Why settle for sliding around when you can build yourself a proper bed? You’re already positioned perpendicular to the slope, so now you’ll level the ground beneath you. Drive two sturdy tent pegs uphill from your sleep area. Brace a thick log or branch against them, creating a retaining wall. Fill gaps with smaller sticks and debris until you’ve flattened a space roughly your body length wide.
This isn’t fancy carpentry, just functional terrain management. In Colorado’s San Juans, I’ve built platforms in twenty minutes that held firm through gusty nights.
The goal isn’t perfect flatness, just eliminating the steep angle that drains your energy. Pack the foundation tight. Test it by lying down before inflating your pad. You’ll sleep better for the effort.
Recommended Products

Included rainfly offers extra weather protection

Large Interior & Screen Room: This 8 person tent is 20(14+6)' x 8' x 76", it well fits 2 full size airbeds and other camping gears. With 76" center height, you can stand up and move freely inside. The screen room offers a big bug-free relaxation space for you and your dogs

ROOMY INTERIOR: Straight wall design with 72in center height create more space to stand up changing and move
Stop Your Pad Sliding on Inclined Tent Floors
You’ll stop your pad from becoming a midnight sled with three straightforward adjustments: grip tape application, air pressure adjustment, and pad material selection.
Letting some air out of your sleeping pad, so your heavier hips and shoulders sink in and grab the surface, works wonders on angled ground. Anti-slip tape applied strategically under your contact points offers cheap insurance against drift.
Choose pads with grippy underside textures, or layer natural materials beneath for friction, and you’ll finally sleep level on slopes that used to defeat you.
Recommended Products

A MUST FOR TENT: An extra tent tarp doesn't just give you extra waterproofing, it is used as ground cloths under tents to prevent wear and tear. There's no question that an insulated tent footprint is a great idea to help protect your investment, definitely the choice to extend your tent’s life

Double Waterproof Protection: Tent footprint is made from waterproof 210T polyester fabric with silver waterproof coating, which can provide double waterproof protection, ensuring your gear and belongings stay dry in wet conditions

DURABLE: REDCAMP waterproof tarp is made from 210T ripstop polyester fabric that is waterproof (PU2000mm)
Grip Tape Application
How do you keep from sliding downhill when your tent floor feels more like a ski slope than a sleeping surface? You apply grip tape to your sleeping pad’s underside. This anti-slip tape creates friction where you need it most.
Cut strips and place them under your shoulders, hips, and feet when your head points uphill. These key contact points anchor you against gravity’s pull. If you sleep perpendicular to the slope, run one long strip along the downhill edge to stop sideways sliding.
Check your pad first. Some come with textured bottoms that grip well enough. If yours still slips on contact, add the tape.
This method targets pad movement specifically, working alongside other slope techniques to keep you stable through the night.
Air Pressure Adjustment
Grip tape helps, but your pad’s inflation level matters just as much.
You need to let some air out of your inflatable sleeping pad. This allows your heavier body parts, shoulders and hips, to sink slightly into the surface. That partial deflation creates grippy contact surfaces where your body meets the pad.
You’re not aiming for a fully inflated raft. That actually works against you on slopes. Fully inflated pads slide more because they don’t conform to your shape or the tent floor. You want just enough air to keep you off the ground, maybe 70% inflation.
Test it. Lie down and feel if you’re drifting. Adjust until you settle in place. Combine this with grip tape at your shoulders, hips, and feet when your head is uphill. For perpendicular sleeping, run a long strip along the downhill edge. You’ve now got friction working at multiple points.
Pad Material Selection
Why does one pad grip while another slips? You’re fighting gravity on slopes, and pad material determines your slopesafety success.
Inflatable pads work better when you let some air out. You sink slightly, creating friction against the tent floor. Fully inflated, you’ll slide all night.
Consider these pad strategies:
- Deflate your inflatable pad 20-30% to increase surface contact and grip
- Apply grip tape or choose pads with textured, rubberized undersides
- Layer logs, branches, or pine needles beneath for stability on uneven ground
- Switch to a cot with adjustable legs to level your sleep surface entirely
Position your head uphill whenever tent dimensions allow. Pad your downhill side with extra clothing or gear. You’ll stop rolling. You’ll sleep.
Elevated Alternatives: Hammocks and Adjustable-Leg Cots
Where do you turn when the ground beneath you refuses to cooperate? You look up, or you raise your sleeping setup.
Hammocks deliver slope comfort by removing ground contact entirely. You’ll need two sturdy trees roughly 12 to 15 feet apart, but modern options like the Amok Draumr turn awkward hillsides into suspended bedrooms. I once slept through a 15-degree slope that would’ve ruined any pad-based night.
Adjustable-leg cots offer another escape. You extend individual legs to compensate for tilt, creating a level platform where none exists. You’re off damp soil, away from drainage paths, and sleeping stable.
Quick setup matters when light fades fast. Choose cots with wide leg adjustment ranges, verify weight capacity, and add insulation underneath. Cold air beneath you steals heat faster than you’d expect.
Recommended Products

Our 20 Pack 8in Tent Stakes Heavy Duty set is made of rust-resistant galvanized steel with corrosion resistance, making them perfect for campers who want to spend less time setting up and more time enjoying the outdoors.

Ultralight, the right size and color: Weighing only 12-13 grams/0.46-ounce per peg, it doesn’t add unnecessary weight to your pack. 7 inch length provides good ground hold for most conditions. Red stakes are highly visible, reducing the chance of being lost or forgotten

Lightweight: 7075 aluminum ultra-light three-sided aluminum tent stakes; The Length of the stakes: 7 inch;